Showing posts with label card making. Show all posts

Thursday, 19 January 2017

Back to Blogland with this Butterfly GAP Card - Trimcraft DT


Hello, yes it's me! I'm back again after a little break.  A lot happened towards the end of 2016, some good (Cardmaker of the Year!) unfortunately some sad (a very dear friend passed away). But with a New Year comes new beginnings and new inspiration and I'd like to start by sharing this  +Trimcraft Ltd project with you.


Have you seen the free Dovecraft die set on the cover of Crafts Beautiful magazine (February Issue #302)?  It consists of 2 dies, a large and detailed butterfly die and a ‘With Love’ sentiment.  I thought I would update my Butterfly GAP card style with a modern look, so have teamed vibrant Cerise glitter card with the black & white papers of FE ‘Black Out’. The turquoise inside panel adds just a pop of contrast colour to peep out from the ‘gap’.  Gap cards don’t always have to involve straight lines, you can easily alter the look by using a gently curving line like this one.

Step By Step:
  1. Score and fold Dovecraft A4 black card and trim down to create a 7 ½” x 5 ½” card base with fold across the top.
    Cut a panel of turquoise paper from First Edition ‘Story Teller’ 8x8 paper pad and adhere inside card using d/s tape.

  2. Cut a panel of floral black & white paper from the FE ‘Black Out 8x8 pad and adhere to card front using d/s tape around the edges but also glue on the reverse particularly along where the diagonal line with go.
  3. Open up card blank with card front paper side upwards and using a craft knife or scissors carefully cut a simply wavy line across the card front, see photos. (You may wish to pencil the line first to guide you).
    Remove the bottom part and trim a small strip off the bottom so the wavy line is now a small gap when positioned against the card base.
  4. Using the free Dovecraft die set, cut 1 sentiment and 3 butterflies from Dovecraft Cerise glitter Card (DCGC18). 
    Using a clear drying glue, adhere the sentiment and 3 butterflies onto Dovecraft Vellum and cut each out leaving a border all around. 
  5. Next cut 3 more vellum butterfly outlines and use these to ‘attach’ the top and bottom of the card front, you will need to use a clear drying glue and position them at angles so they look to be flying across the card.  (Use something heavy to hold down the card front whilst the vellum butterflies dry.

    When Gap card is attached, add the 3 glitter & vellum layered butterflies on top of their matching vellum shapes along the ‘Gap’.  Fold up the wings on each butterfly and glue only along the body.  When dry you can bend up the wings a bit more.
  6. Adhere the Glitter & Vellum layered sentiment to card front at top left.
    Add a length of purple ric rac ribbon across the bottom of the card (Santoro) using clear drying glue and allow to dry.
  7. To finish, add a sprinkle of Bohemian Sequins gluing in place. 
    Note*If you wish to add more strength to your card front, then just cut a piece of Dovecraft Acetate the same size as card front and use a strip of perma fix tape along the top only and attach behind card front panel to give an extra independent clear layer.  (You could also use this to add a hidden sentiment if you wish).

Products Used:
Free Cover Gift - Dovecraft Die Set - Crafts Beautiful Magazine

First Edition 8x8 FSC Paper Pad Black Out

FEPAD141

First Edition 8x8 FSC Paper Pad Storyteller

FEPAD138

Dovecraft A4 Black Card

DCBS102

Dovecraft A4 Premium Vellum

DCBS78

Dovecraft A4 Acetate Sheets

DCBS106

A4 Glitter Card (Cerise)

DCGC18

SANTORO®'s Willow Ribbon Box

SNCR003

Dovecraft Bohemian Sequins 

DCSEQ002


Friday, 8 January 2016

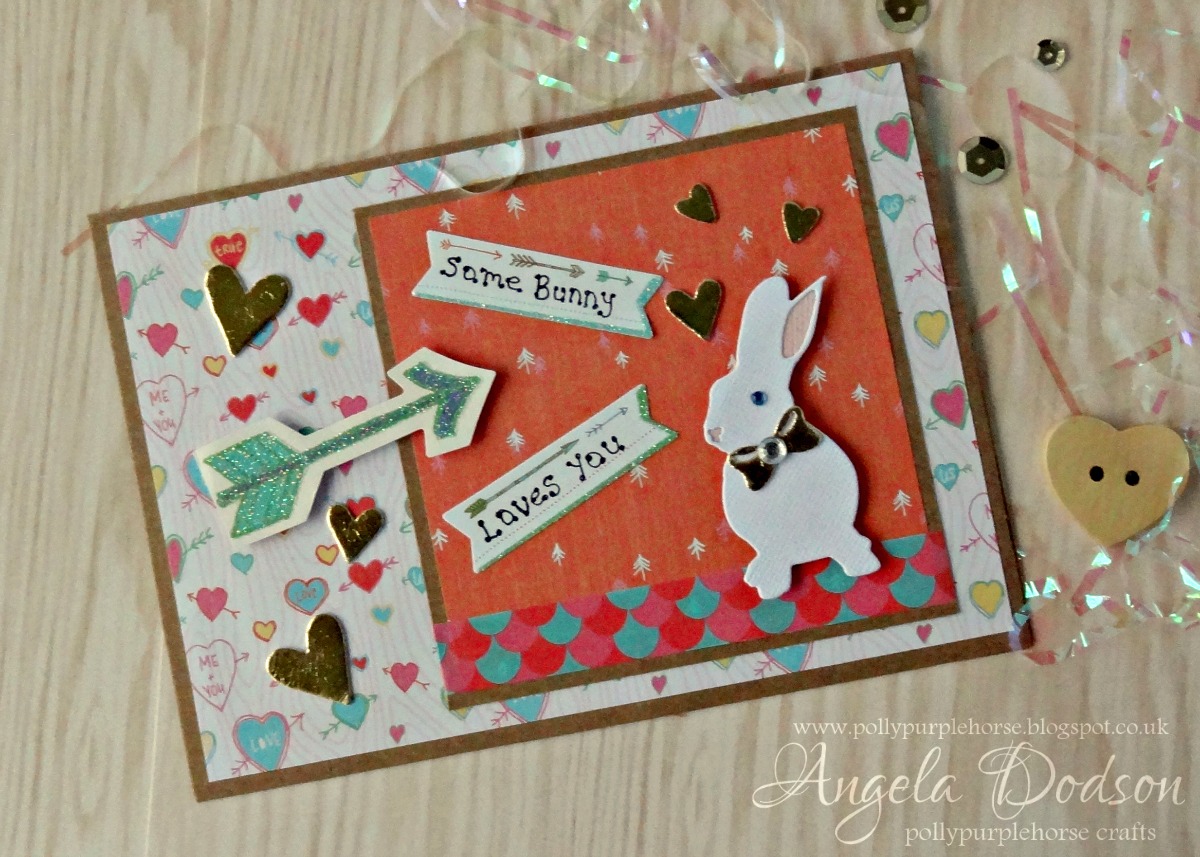
Some Bunny Loves You!!


How cute is the new Grace Taylor Forest Friends collection from +Trimcraft Ltd , I couldn't resist teaming them with the cute bunny from the new First Edition Animal Die set to create a Valentines card.   I also had fun playing with the Gold Foiling and adhesive foam sheets.  (If you've not tried foiling then give it a go, you can still get great results if you haven't got the applicator machine, all my foiling is done with the adhesive foam on this project)

The Forest Friends collection is perfect for card making as well as scrap booking as it has lots of lovely embellishments such as the fun sticker book , shaped paper cuts and washi tape.
 
 
Thank you for popping by and I hope you will join me again as I have another card to share with you later :)

Tuesday, 12 May 2015

Saying my Thank You's in Bright Pink!! with Papermilldirect


Hello, welcome to another week and another blog post.  The weeks seem to be flying by and I still can't believe it's May already!!  My daughter will soon be finishing her College course and my son will be starting his final year at Primary School after the summer holidays, where on earth does the time go??

This week I've been working with the new Special Offer card at +papermilldirect  , a really bright and cheery pink called 'Bright Pink' of course.  It is 160gsm and available in an A4 pack of 30 for just £2-25 - Link Here: 

I decided to make 2 cards on the theme of 'Thank You'.  The first is this fun 'Thanks a Melon' card:

I started by cutting the layered sentiment and melon shapes on my Circuit Explore. Although the melon shape is very simple and could easily be cut by hand and a stamped or die cut greeting added for those without a cutting machine. The Bright Pink 160gsm offer card cut cleanly and easily in my Cricut Explore using the same Cardstock+ setting I use as standard (although my blade is probably not as sharp as it was). I also popped the pink melon segment through my Big Shot to emboss it with a Dots design so you can see it is a very versatile weight card.

The melon layers were assembled using 3D foam to give height and the sentiment layers were adhered using clear drying Cosmic Shimmer Glue. I thought the Bright Pink worked really well with the green cardstocks and along with the rounded rocking base it created a fun way to say Thank You.


For my 2nd Card I created a different style of Thank You card, again using the Bright Pink offer card to create an elegant look. This time teaming it with Ivory Linen and a touch of Spring green to lift the pink. I do love pink and green together.
The bright pink panel overlay was cut on the Cricut Explore, again you can see how cleanly it cuts even with my blunt blade. I layered the overlay onto a panel of Ivory Linen cardstock to give a touch of luxury and texture to the design. The completed panel was then mattered and layered onto PMD Spring Green card to give a small border all around and then the whole front was mounted onto a card base made by scoring & folding Ivory Linen cardstock.

The sentiment of ‘Thank You’ was also cut on the Explore, This time I used the PMD Spring Green as the contrast and added a shadow layer of the bright pink adhering with Cosmic Shimmer glue before mounting to the card front with 3D foam pads to create height.

Using a Fiskers 2” butterfly punch, I punched a butterfly from Spring Green Card and added sparkle to the wings by applying Detail Sparkle in White Shimmer. I added 3 pale green adhesive gems to the body and also 3 more to the top left hand side of the card front to finish.


Materials Used For Melon Card: All card is Papermilldirect – Bright Pink ‘offer card’, Teal, Spring Green, & Black card.
Adhesives – 3D foam Pads, Cosmic Shimmer Glue
Cuttlebug Embossing Folder 'swiss dots', 

Cricut Explore using Design Space subscription images and sentiments

Materials Used for Overlay Card: All card is Papermilldirect – Bright Pink ‘offer card’, Ivory Linen, & Spring Green card
Adhesives – 3D foam Pads, Cosmic Shimmer Glue
Fiskers - 2” Butterfly Punch
Imagination Crafts – Detail Sparkle in White Shimmer
Pale Green Adhesive gems

Cricut Explore using Design Space subscription images and sentiments

Papermill Design Team:
if you have a moment, please do pop over and check out the other papermill teamies blogs and see what they got up to this week: 

Wednesday, 6 May 2015

29 Again!! with Papermilldirect


29 Again!!  no not me, but that was the inspiration for this week's make using +papermilldirect cardstocks.  The Team were working on the theme of 'age' cards and I went with a kind of 'anti-age' vibe just for fun :D

First news of this week's Special Offer, a rather gorgeous shade of Turquoise in a 250gsm and you can get your hands on a small A4 sized box for just £4-50!!  I'm thinking  this one will be quick to disappear, so grab some whilst you can - you'll find it in the Special Offer section Link Here:

Okay, back to being 29 Again, I do like how that sounds ;)

I created this card using my Cricut Explore to cut the Flamingo and ’29 again’ sentiment.  The card base has been created by scoring and folding PMD black card.  Panels of PMD Raspberry Pink and PMD White Seal Embossed card have been matted & layered onto the card base and also a separate card panel to display the Flamingo. 

The flamingo is a simple 3 layered shape comprising PMD Black, PMD Raspberry Pink, and PMD Baby Pink.   I love the contrast of the black and white against the bright pink and decided to go minimal on the embellishments to make the most of the striking colours.   

I die-cut some corner flourishes from the PMD Black card and used them to help frame the sentiment and used Clear Sparkly Adhesive gems to highlight the black words.  The eye of the Flamingo is a black sequin with a faux adhesive pearl, and a couple of clear adhesive gems decorate the body.   

 To finish I added a trio of Black adhesive gems to the top right of the flamingo panel and another trio to the bottom right of the base card.  I thought I would make use of the fabulous texture of the White Seal Embossed card which is on Special offer, but the White Linen, Leather, or hammered would work equally well or you could emboss PMD plain white with a decorative pattern to give a different look.


Materials Used:


Adhesives: Double Sided Tape, Cosmic Shimmer Glue

Cricut Explore (Design Space software)

Black & Clear sparkly adhesive gems, black sequin, faux pearl

Dies to cut corner flourish


Papermill Design Team:
if you have a moment, please do pop over and check out the other papermill teamies blogs and see what they got up to this week: