Showing posts with label papermill. Show all posts

Tuesday, 9 June 2015

Simple Makes - Kids Thank You Card with Papermill Direct

Hello, this week I'm sharing a simple thank you card that children can make by themselves using simple everyday materials.
This is the resist technique at it’s most basic. I think every child will have access to Wax Crayons and some type of watercolour paints or even water with a little food colouring would work.  

But first I have news of this week's Special Offer from +papermilldirect which is a 300gsm card in a really rich Violet colour, this gorgeous card can be yours in an A4 box for just £5-28 a saving of 40%!!  - Link Here

Back to the thank you card, which children can create by simply writing with a white or pale coloured wax crayon and washing over with watercolours to reveal the sentiment or picture they have drawn. For very young children you could assemble the greeting onto a card base for them. Older children can have fun adding twine and buttons to their design, perhaps adding drawings as well as a sentiment.

To create this simple but bright card I wrote the word ‘Thanks’ onto Papermilldirect Plain White card using a white wax crayon. As I already had some water based Aqua Markers I used those to add strokes of colour across the wording and then washed over with a water-brush. The same effect can be made by using any water based colours and a paintbrush to reveal the sentiment. I then trimmed the design to measure 4” wide x 3 ¾ “and matted this onto PMD Apple Green card to leave a small border using double sided tape. Twine was wrapped around the completed panel and secured on the reverse. 
The card base was created by simple folding and scoring PMD Plain White Card and trimming down to measure 5” x 4 ½ “ which accommodates the design and is a child friendly size. The completed panel was attached to the card base using 3D foam pads to give height and extra interest, it is also easier for your child too, and if a little wonky will only add to the beauty of a card a child has made themselves. A bright pink coloured button threaded with twine and tied in a bow was added to finish the design.

**There is also exciting Design Team news as we welcome Nessa to the team, welcome aboard Nessa!! (you can find her blog link below)**


Materials Used:
Papermilldirect Plain White Card
Papermilldirect Apple Green Card
White Wax Crayon
Letraset Aqua Markers in Rose Carmine, Flame Red, Straw Yellow, & Celery
Water and brush
Natural Button Twine, Bright Pink Button,
Adhesives: Double Sided Tape, 3D Foam Pads


Papermill Design Team:
if you have a moment, please do pop over and check out the other papermill teamies blogs and see what they got up to this week: 


Tuesday, 13 January 2015

Love and be Loved!! with Papermill and Visible Image Stamps

We are well into January now and crafters I'm sure will be working on their Valentines projects.  Have you checked out  +papermilldirect's new seasonal landing page 'Valentines'.  Don't forget to also check out the 'Special Offers' section too, a brand new offer has just been added,  20 sheets of 250gsm Black Card for just £4-00

So with the Valentines theme in mind I thought it would be nice to combine some stamping and colouring along with my cricut explore this week. 

The base card was cut on the Explore using papermilldirect white linen card and Post Box Red card.  I love the texture of the linen and along with the red, it's a classic Valentine combo.  Using a grey pen I added some faux stitching detail around the edges of the white card front, sort of stitches with dots that I hoped echoed the rivets on the Tin Man.  Using the sentiment stamp of 'Love and be Loved' from the set, I stamped with black Memento ink into the heart aperture area of the red card.  I then attached the white heart aperture panel to the red card base using 3D foam pads to create depth.

The 'Oz Tin Man' stamp set is really cute  and this was my first chance to play with it.  (there are other characters in this series by +Visible Image which celebrate 75 years of Oz) Using black Memento ink, I stamped the Tin Man and his little clockwork heart onto smooth white card and coloured with Promarkers.  I kept the shades subdued with just a few greys, pale blues and dashes of red shades. (unfortunately it was a dark dull day when i took the pics so I used my daylight lamp and not sure if it washed out the colours a bit but hopefully you can see some colouring :D)  I then carefully cut around the Tin Man and Heart and added them to the card front using 3D foam pads.

For the inside of the card I used the white linen heart shape that was cut from the front panel, it gave a co-ordinated look and was ideal size for the sentiment.  It's nice when you are able to use the shapes that would normally be discarded.

For the finishing touches I added some red faux gems in heart shapes and a little trim of red & white bakers twin tied in a bow.

Materials Used: 
White linen Card, Smooth White Card - Essentials Range - Papermill Direct
Post Box Red Card - Colours Range - Papermill Direct  
'Oz Tin Man' stamp set - Visible Image Stamps 
 Promarkers
Grey Glaze Pen - Sakura
Bakers Twine and faux gems from my craft stash
Adhesives - Double Sided Tape, 3 Foam Pads
Tools - Hougie Board to score and Cricut Explore for base.


Challenges Entered: 
I'm going to enter this card in the 'January - Show & Tell' over at Visible Image's facebook group https://www.facebook.com/groups/visibleimage/photos/

Papermill Design Team:
if you have a moment, please do pop over and check out the other papermill teamies blogs and see what they got up to this week: 
Barbara  

Lisa  
Sylvia  
Sandie  
Sharon


Thursday, 8 January 2015

Oh Baby it's 2015 - with Papermilldirect

So I spent the last days of 2014 and the first days of 2015 in a kind of cold / flu bug hell.  I was so tired and poorly I fell asleep before midnight and totally missed the heralding of a New Year.  Now I'm feeling much better and (fingers crossed) raring to go!!  So to kick off the new year we are celebrating new life over at +papermilldirect our theme is Babies!!  (Why not pop over and check out the Special Offers section, this week there is a rather yummy 'flecked lilac' 240gsm A4 card on offer at just £6 for a small box, along with some other goodies you may have missed)

There's also the launch of a Valentines section which also introduces some brand new Cardmaking Kits!!  

Now back to the theme of 'Babies' and I have seen a few of these block style cards over the years but have never actually got around to making one, so I put that right and here is my first one, it also ties in nicely with the 'Something New to You' Challenge Theme over at Country View Challenges.  I am using a brand new Die Set and also making a new to me style of card, what a great way to start the year.  (as always links and materials lists are at the end of the post).

The base card was created using White Hammered card and the sections were scored using my trusty Hougie board.  I inked around the card and each section using a pale pink distress ink.    Next came the fun part of decorating.  I used dies to cut small scalloped squares and some heart shapes from Baby Pink card & Raspberry Pink card and again inked around edges with pale pink ink, adding a faux stitch detail with a white Pergamano pen.  I used dies to cut alphabet letters to spell BABY from Raspberry Pink card and added them to the Baby Pink card squares.  Squares were then adhered to the blocks card using double sided tape, I used 3D foam to attach the layered heart to give some height.  
The baby girl image was stamped onto Smooth White card and coloured with promarkers, a little glitter glue was added to highlight the lace trim. Then the image was cut around and attached with 3D foam.  Pale pink faux gems & pearls were used to decorate the front squares. 
For the top panels I added 3 more of the Baby Pink scalloped squares and decorated with a button, heart, and a white bow.


I'm quite pleased with the way this first attempt turned out and also the fact that I could actually get 2 of these from 1 sheet of A4 card makes these quite economical to make, as you can decorate with whatever you have to hand. These little blocks cards (I sometimes see them described as Stairs too) can be used for all sorts of occasions and they fold flat to fit into envelopes too, making them ideal for postage.  (just be careful with height of embellishments)  Now I need to make a Baby Boy one or maybe a Twins one, or a Birthday one?  decisions, decisions  :D
 

Materials Used: 
White Hammered Card - Essentials Range - Papermill Direct

Raspberry Pink Card & Baby Pink Card - Colours Range - Papermill Direct
Spun Sugar Distress Ink - Tim Holtz
Baby Stamp (from Die & Stamp Set) Collectibles COL1313 - Marianne Design
Layered Hearts (from Die & Stamp Set) Collectibles COL1307 - Marianne Design
Alphabet Dies - Varsity FEDIE007 - First Edition
Square Dies - Lacy Squares Nestibilities S4-295 - Spellbinders 
Tuxedo Black Ink - Memento
Vanilla, Blush, Pastel Pink, Baby Pink, Blossom - Promarkers
White Pen - Pergamano
White Shimmer Detail Sparkle - Imagination Crafts 
Button, Enamel Dot Hearts,White Bow, & Faux gems - Trimcraft
Adhesives - Double Sided Tape, 3 Foam Pads
Tools - Hougie Board to score and Big Shot to cut dies.


Challenges Entered: 


'Use Something New to You' - Country View Challenges 
I'm using a brand new alphabet die set and a brand new to me style of card :)

Papermill Design Team:
if you have a moment, please do pop over and check out the other papermill teamies blogs and see what they got up to this week: 
Barbara  

Lisa  
Sylvia  
Sandie  
Sharon


Monday, 8 December 2014

Joy to You & Yours ... with Papermill & Oakhouse Studio

Waving hello and welcome to another +papermilldirect blog post.  This week's Special offer is the super popular 'White Felt Embossed' card which is just £6 for a small box of approx. 80 sheets!! (Link here).

The Design Team are still working hard on Christmas projects and I have a new one to share with you too. (challenges, links, materials lists, etc at end of post).
 This time I thought it would be nice to test out some new toys (spray inks from +oakhousestudio) and see what happens when used with Papermill's 'Plain White' card.  This versatile card was put through it's paces to create this Christmas Bauble card.
First I embossed the background panel, then proceeded to cut and emboss the various elements to make the bauble design.  The card base is also 'Plain White' card scored and folded, and then I gently swiped 'Pumpkin Pie' ink round the outer edge.  More 'Pumpkin Pie', along with 'Tempting Teal', 'French Lavender' and 'Glorious Gold' was applied to the individual parts to layer the bauble.  I used a mixture of swiping, spraying and painting with a paintbrush to bring out the design.  I love the effect of the  'Glorious Gold' when sprayed, it gives a beautiful speckly sparkly effect (my apologies the pics here do not show up all the prettiness).  I sprayed the background panel and also the die cut pieces with lots of gold ink to create shimmer.
 The bauble design was layered up using 3D foam pads to give lots of depth and texture.   I added a vintage gold coloured sheer ribbon to the top, tied in a bow, and faux pearls in different sizes to decorate.
 My little crafty playtime ink testing turned into a completed project, and I do love how it turned out.


Materials Used: 
Plain White Card - Essentials Range - Papermill Direct
Glorious Gold, Pumpkin Pie, Tempting Teal, & French Lavender - Ink in a bottle Spray Inks - Oakhouse Studio
Ornament Set #657974 (embossing folders & Dies set) - Sizzix 
Ribbon and Faux pearls from my craft cupboards


Challenges Entered:  (Sadly I was too late to enter the Oakhouse Studio Challenge)

But I am entering the Nostalgic Christmas Challenge over at http://countryviewchallenges.blogspot.co.uk/2014/12/decembers-festive-challenge.html
The theme is Nostalgic Christmas and not necessarily vintage, pop over and take a look at all the fab entries so far.  I choose to make this card as the bauble design reminds me of christmasses past and some old glass ornaments that were my grandmother's, I still try and pop a couple on the tree each year but they are so fragile and break easily.  The wording too conjures up a heartfelt sentiment.  
Papermill Design Team:
if you have a moment, please do pop over and check out the other papermill teamies blogs and see what they got up to this week: 
Barbara  

Lisa  
Sylvia  
Sandie  
Sharon


Wednesday, 3 December 2014

Getting Merry... with Papermill

Hello again, and as promised here is my 2nd make with the Special Offer 'Warm White' card from +papermilldirect  (£6-77 for a small box or why not treat yourself to the Midi  box at £20). 

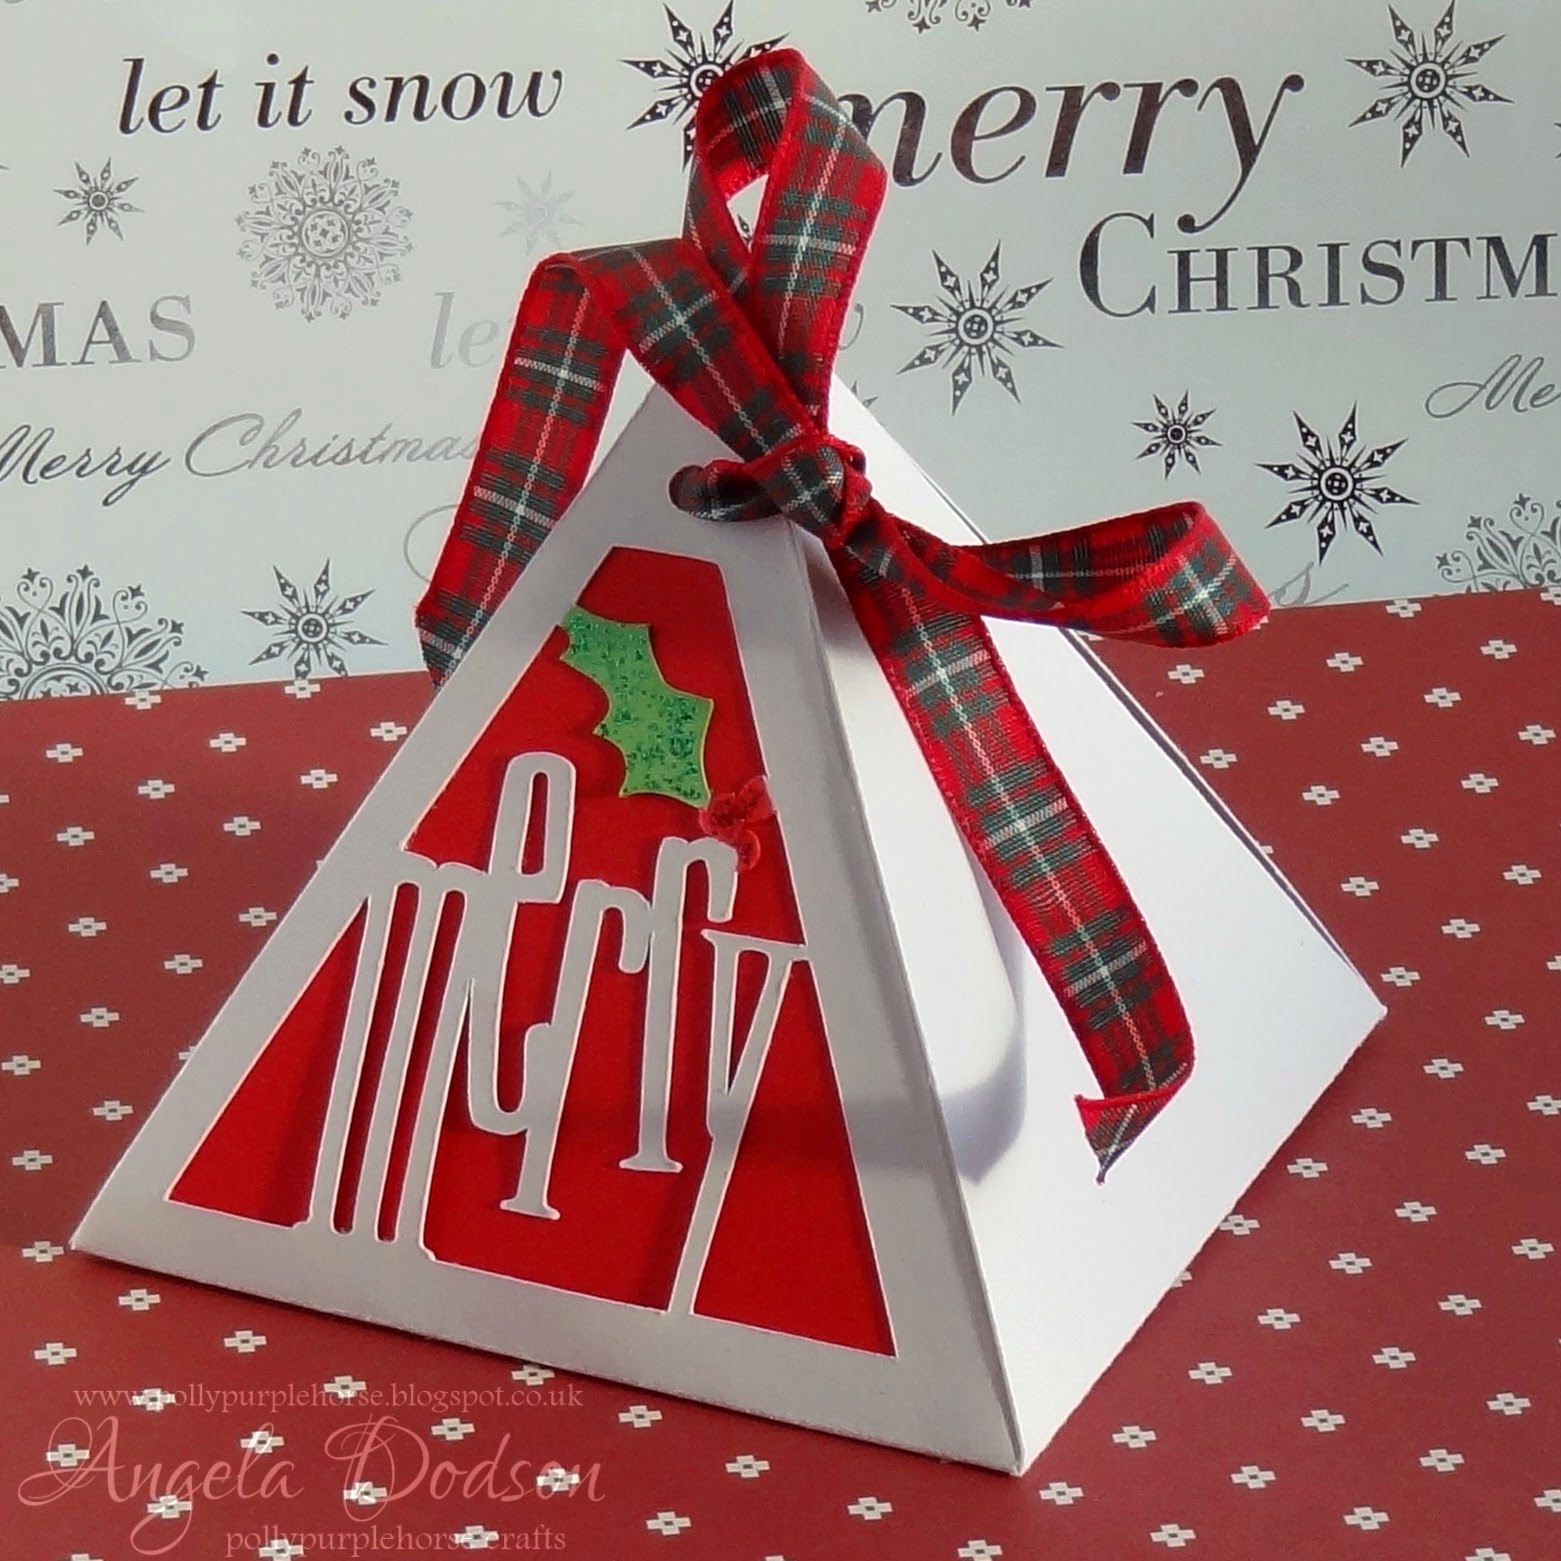
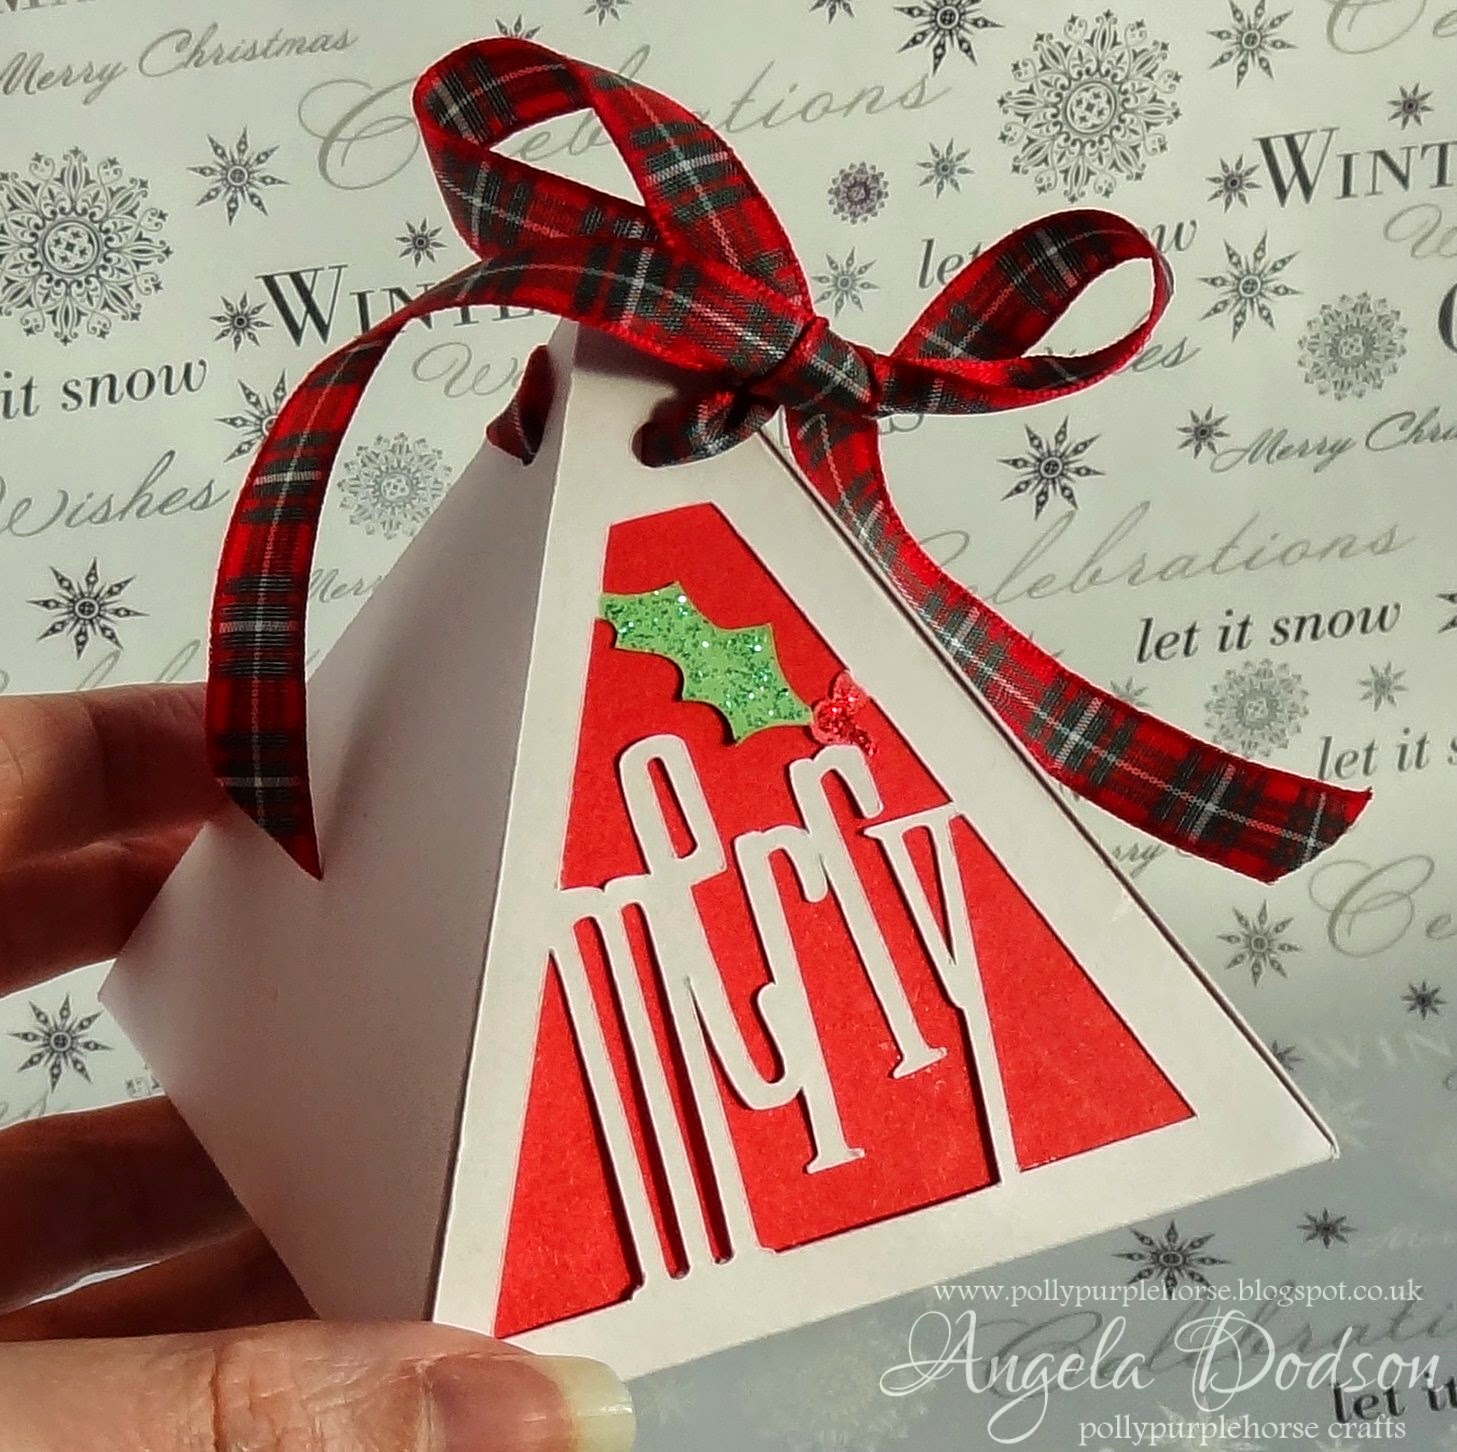
This time I'm getting all Merry with a little festive pyramid box that would be great to pop little treats or gifts in and hang on the tree or pop on the table for Christmas dinner guests.  (Materials List, Links and a quick 'how to' are at the bottom of this post)
Using my Cricut Explore I used a design set called 'Fancy Boxes' and cut the Pyramid shaped box from Papermill's 'Warm White' card.  This was the first time using the Cricut's scoring tool and it worked quite well on this 270gsm cardstock making the job of folding much easier.

The Centre panel has been cut from lovely 'Post Box Red' card and the brightness helps to set off the jaunty 'Merry' sentiment.  For the holly shape I first coloured in promarkers and then topped it off with green and red glitter glues to add a touch of sparkle.

I found a red & green tartan ribbon in my ribbon drawer and threaded it through the holes at the top of the pyramid shape tying it in a loose bow, so it can be easily opened to get to the treats inside.

Materials Used: 
Warm White - Special Offer Card - Papermill Direct
Post Box Red card - Colours range - Papermill Direct
Promarkers in Red and Green, Glitter Glues in Red and Green, Tartan Ribbon


This project was created using a Cricut Explore and the Design Space Software, as follows:


In Design Space, search for the 'Fancy Boxes' Image set and locate the Merry pyramid box shape and insert image onto your screen mat. 
You can resize the shape by using the resize tool at the bottom right corner of your image and pull it to desired size.  (I often find it difficult to visualise the completed size of a box - so to make it easier for myself, I found (in Design Space) another image of a basic Square and inserted that onto the mat to use as a template to help me size the bottom of the pyramid box.  I wanted the bottom to measure roughly between  3" to 3.5" square, so I sized the new square to those dimensions and then placed that over the pyramid box to guide me to the size to drag the pyramid box shape to (much simpler than I made it sound).  When you have the right shape for your pyramid box then you can delete the extra square as it is not needed.
(Pic to help show the sizing on the Cricut Mat)
 Then be sure to pop your scoring tool into your Explore so that it can cut and score at the same time.  Once it's cut out, you can fold the box along the score lines.  The extra panel (I cut in red card) is also in the Fancy Boxes design set and can be cut out or you could just cut a panel of card by hand to fit behind the 'merry sentiment'.  Glue the red panel in place behind the front 'Merry'.  

Colour the holly with green and red pro-markers, adding some red and green glitter glue if desired.  Thread your ribbon through the holes in the top sections of the box and gently pull together to close it, you may wish to tie your bow very loosely so it can be opened easily to put treats inside and get them out again :)

Challenges Entered: 


Papermill Design Team:
if you have a moment, please do pop over and check out the other papermill teamies blogs and see what they got up to this week: 
Barbara 
Lisa  
Sylvia  
Sandie  
Sharon


Tuesday, 2 December 2014

Merry Kissmas!! ...with Papermill

Gosh it's December already, where did my year go?  feels like Christmas is really coming up fast now, but there is still time to make those projects and cards and +papermilldirect have lots of goodies on their Special Offers page including a new one for this week, it is a gorgeous 270gsm Warm White card at just £6-77 for a small box or why not treat yourself to the Midi  box at £20?

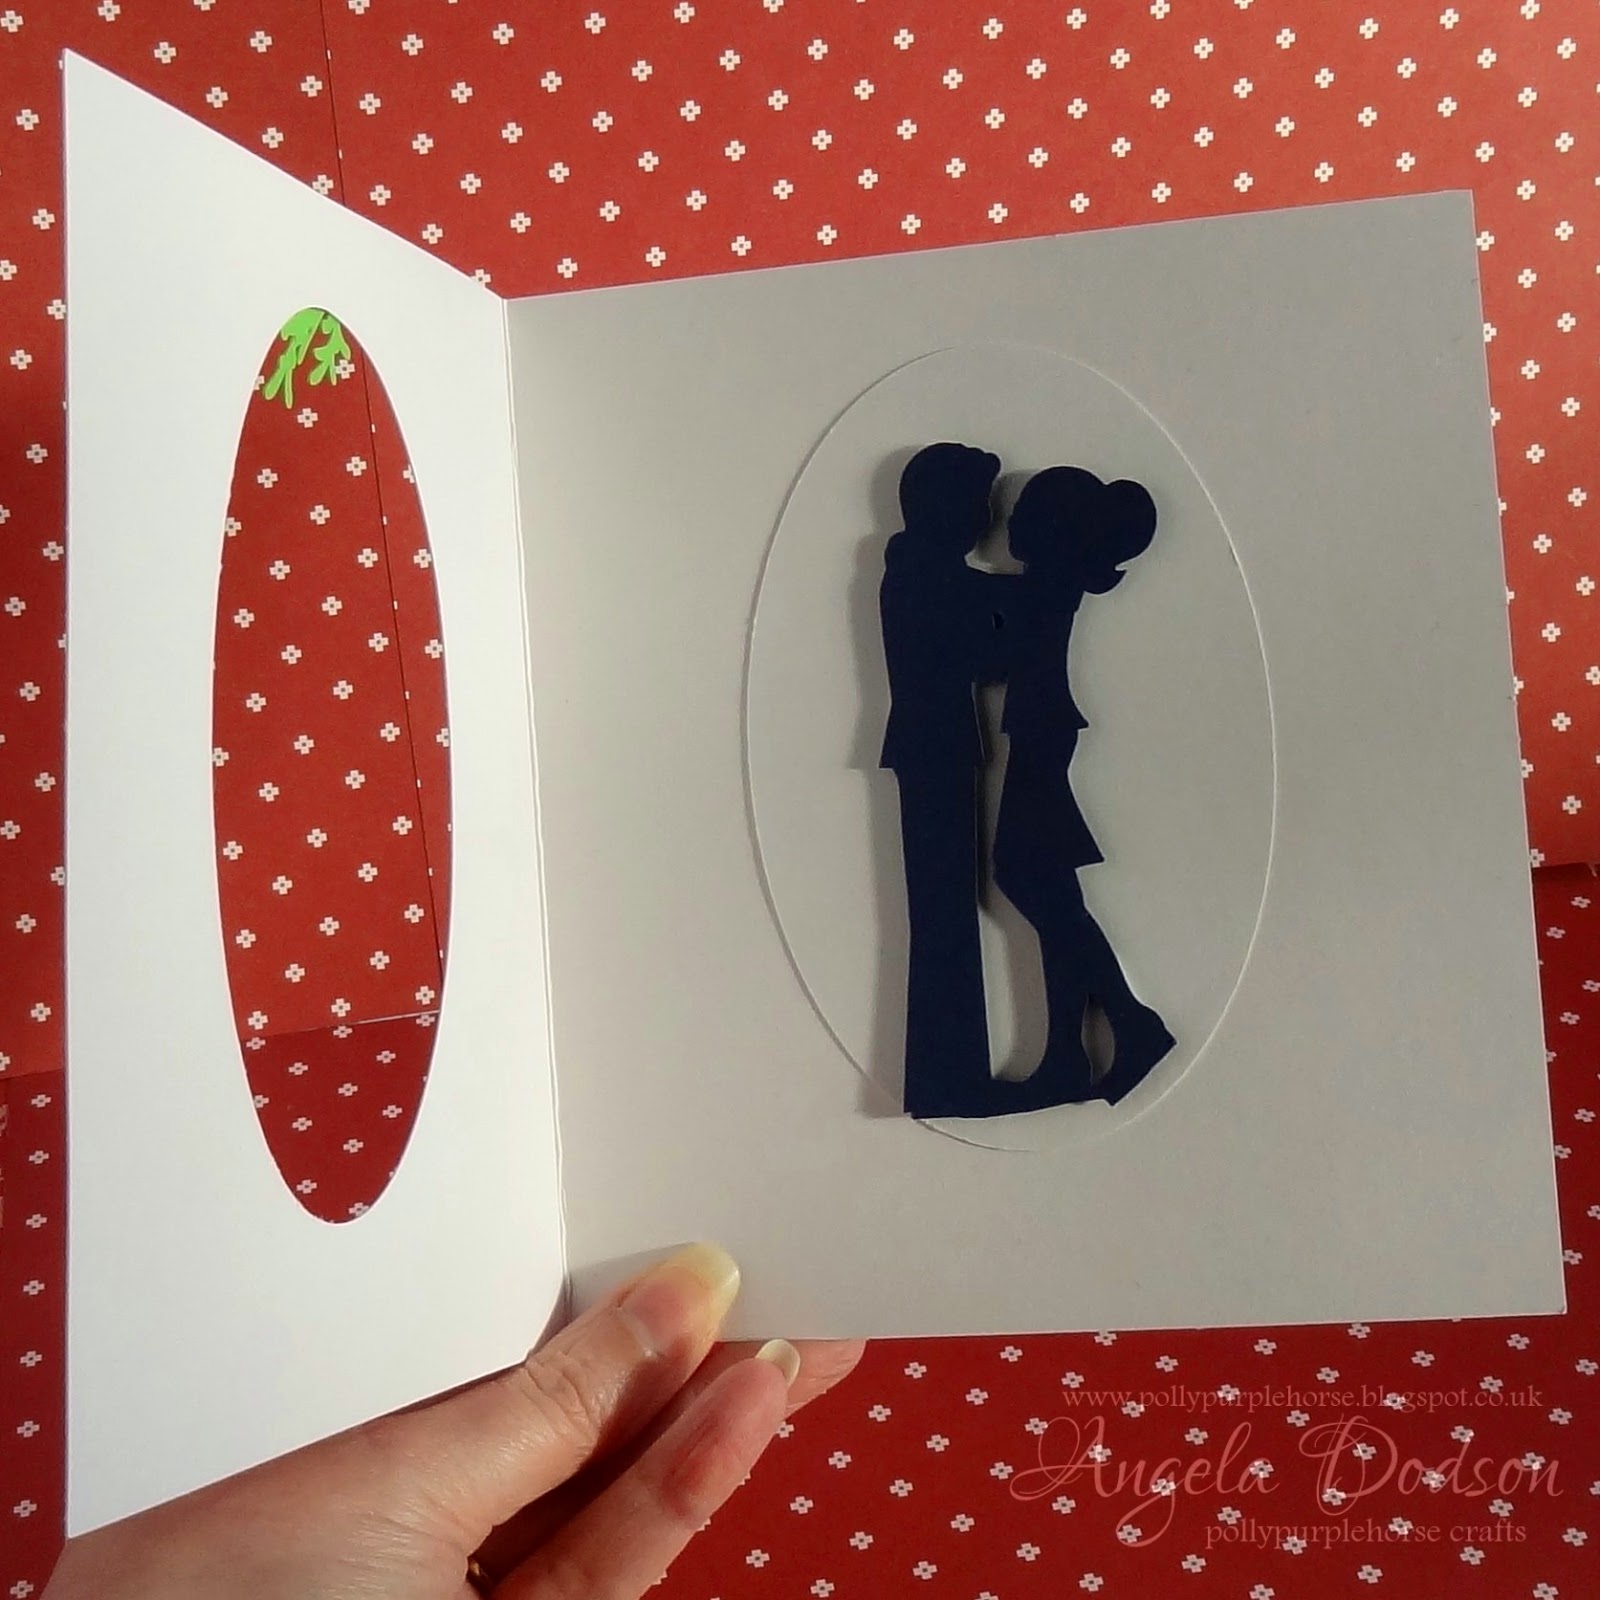
I have 2 makes to share with you this week, both using this week's Special Offer 'Warm White' cardstock, and I will share one tomorrow too, but first up is a simple design based around a theme of mistletoe and kisses.

 I used my Cricut Explore to design this card and created an oval aperture card from the 'Warm White' offer card. The silhouette of the couple embracing was cut from Navy Blue card and positioned inside aperture, (I sat it on the oval that was cut from the card front).
I cut Mistletoe shapes using  'Apple Green' and 'Post Box Red' Papermill card and attached to the front just above the aperture.  Liquid Pearls provide the berries.

The sentiment 'Merry Kissmas' was also designed and written with the Cricut Explore using a Cricut pen in 'Metallic Copper'.

I think the Papermill 'Warm White' card worked really well for this project especially using Navy Blue rather than black for the couple.  I could have embellished further but I really like the simple styling and think it works well with the theme.  


Materials Used: 
Warm White - Special Offer Card - Papermill Direct
Navy Blue, Apple Green, & Post Box Red card - Colours range - Papermill Direct
Liquid Pearls, Cricut Metallic Marker Pen in ' Metallic Copper'


Challenges Entered: 


Papermill Design Team:
if you have a moment, please do pop over and check out the other papermill teamies blogs and see what they got up to this week: 
Barbara 
Lisa  
Sylvia  
Sandie  
Sharon


Tuesday, 25 November 2014

The Magic of Winter...with Papermill

Something really pretty about snowflakes and sparkly fresh snow, even though i don't much care for the coldness of it all, it is still something really pretty and festive when it snows.

If you get the newseltters you will have seen the beautiful snowflake embossing that Sharon has done with This week's +papermilldirect offer it's something a little different, it's a fabulously blue shiny 270gsm card called, yes you guessed it 'Shiny Blue' and it's on offer for just £6-23 per samll box, grab it whilst you can as I doubt stocks will last.

This week I'm sharing a design I have made to stand on my own mantlepiece this Christmas, featuring an Ice Dancer dancing in the snow.  (As always Materials, links, and Challenges entered are at the end of the post :) )

This one sort of evolved around my love of a scene in the movie Edward Scissorhands, where the girl is dancing in the snow flakes / ice.  Whilst my figure is an ice dancer it just conjured up that feeling of joy as the crisp pretty sparkly snow falls.


I designed most of this one on my Cricut Explore.  The base card is cut and layered using Papermill Teal and Sky Blue card.  I added a piece of white hammered card which I had torn and added glitter jewels along the torn edge to create a snowy feel.

The ice dancer was cut from Buff, Baby Pink, and Plain White papermill card. I added some subtle detailing with a versamark pen and the blades of the ice skates have been coloured with a pale grey pro-marker.  Mini faux pearls and a metal snowflake charm were added to her dress.  I attached her with 3D foam pads to give depth to the design.

The sentiment was cut and layered from Teal, and Sky Blue card, I used Buff card to create the shadow base.

Some of the snowflakes were cut with my Cricut Explore but the majority were dies run through my Big Shot.  I added various adhesive gems and pearls in pale blue and pink to the snowflakes. I love the colour combo of the pale pink and blues with the buff and teal.

Materials Used: 
Plain White and White Hammered card - Essentials range - Papermill Direct
Teal, Sky Blue, Baby Pink, and Buff card - Colours range - Papermill Direct
Faux gems & pearls, metal snowflake charm, tiny faux pearl string
versamark pen, promarkers and glitter jewels

Challenges Entered: 


Week 286 No Design Papers Allowed - Allsorts Challenge Blog


Papermill Design Team:
if you have a moment, please do pop over and check out the other papermill teamies blogs and see what they got up to this week: 

Barbara 
Lisa  
Sylvia  
Sandie  
Sharon


Monday, 17 November 2014

P...P...Penguins!! ... with Papermill

Hello, welcome to another week and news of a +papermilldirect special offer.  
 This week it is a 120gsm Snow White Pearlised paper at a bargain price of just £16-22 for an A4 small box (approx. 160 sheets that should keep you going for a while!!)

Let's talk Penguins!!  Penguins are cute and seem to be everywhere at the moment, so I thought I'd theme some Christmas cards around this popular cute character.

It was my birthday recently, and one of my B'day pressies was the new Cricut Explore, although I was a bit naughty and tested it early (well I needed to know it worked okay ;) )  One of the features I was wanting to test out was the 'writing pens' and the 'cut & write' at same time, so these cards feature my first attempt at that.

I started out by cutting the Penguin with candy lollipop using the Cricut Explore and the ‘Winter Frolic’ image set. I used the white hammered card for the body of the penguin as I felt the texture would add interest and a hint of fur to the penguin's tummy.  I was really surprised how well the cricut cut the teeny tiny cane / stick for the lollipop, I was using the papermill buff card for this and it cuts so smoothly and cleanly even with that tiny sliver.

 The wording ‘Sweet Winter Wishes’ has been created using the ‘Cricut Alphabet’ font using the ‘write’ option and a ‘Midnight’ black cricut pen. The wording panel has been cut and written at the same time in the cricut (first time I’ve tried this) using papermill's ‘Plain White’ card, the writing was even and sat neatly on the papermill 'plain white' card surface.

A touch of detail Glitter has been added to the Santa Hat and some ‘Glitter Jewels’ by Cosmic Shimmer provide the snow for the penguin to stand on. The Penguin has been attached to the card front with 3D foam pads to give a little depth to the design. I made 2 cards with a ‘Post Box Red’ card base and 2 using the ‘Sky Blue’ card. Each card measures approx. 5.5” square.  I think it's nice to use bright colours for card bases, you can add a white insert and it really makes the designs more eyecatching, Papermill Direct has a whole rainbow of coloured card to choose from.


Materials List:
Plain White Card - Essentials Range - Papermill Direct
White Hammered card - Essentials Range - Papermill Direct
Post Box Red, Sky Blue, Black, Daffodil Yellow and Buff card - Colours Range - Papermill Direct
'White Shimmer' Detail Sparkle - Imagination Crafts
Cosmic Shimmer 'Glitter Jewels' - Creative Expressions
Cricut Explore (using Winter Frolic, and Cricut Alphabet)


Papermill Design Team:
if you have a moment, please do pop over and check out the other papermill teamies blogs and see what they got up to this week:  

Barbara 
Lisa  
Sylvia  
Sandie  
Sharon


Tuesday, 4 November 2014

Party!! with Papermill

Hello and welcome to this week's makes with +papermilldirect

The theme for the Design Team this week is Parties!!  Yay!!  and if you're holding a party over the festive period or looking to New Year then you may be thinking of making your own invites.

Have you ever checked out the Special Offers section?, well worth taking a look as not only is a new special offer launched each week, but there are often some previous offers still available whilst stocks last.  This week there is a yummy sounding Biscuit card (240gsm) at just £5-50 for 80 sheets.

So back to the party then!! and sharing my design for a New Year's Eve party invitation but it could be adapted for other occasions too.


 I started off by creating a tent fold card base from 'Navy Blue' card to which I added a panel of 'Sky Blue' card across the centre.  I used my little Cricut Mini to cut a layered clock design from Navy Blue, Grey, and rich cream hammered card.  Adding the numbers '2015' die-cut manually from 'Post Box Red' card.  (As the clock is basically layered circles you could also cut with a manual die cutter if preferred). I also cut the 'Party' sentiment in post box red and navy blue card, and layered slightly to give a slight shadow effect.

The layered champagne glasses were cut from smooth white card and the 'glass' part coloured with an ice grey promarker, the 'champagne' was coloured with a pastel yellow promarker and topped with Detail Sparkle glitter glue, I was hoping to give the impression of sparkling bubbly wine.

The simple  shapes are easy to line up and if making a large quantity you could get away with not having so many layers to the clock and maybe stamping the '2015' and 'party' wording.
 I like using the red card to add a pop of colour to the classic blues and greys.

So will you be having a Party this year?  Are you making your own invites?  If you have any questions or just want to say hello, then please do comment, and thank you so much for popping by today :)
 

Materials used: 
Navy blue, Sky Blue, Grey, Post Box Red card - Colours Range - Papermill Direct
Rich Cream Hammered card - Essentials Range - Papermill Direct
Detail Sparkle in 'White Shimmer' for the 'wine'. 
Ice Grey & Pastel Yellow promarkers
Mostly cut using Cricut Mini

Papermill Design Team:
if you have a moment, please do pop over and check out the other papermill teamies blogs and see what they got up to this week:  

Barbara 
Lisa  
Sylvia  
Sandie  
Sharon