Showing posts with label flowers. Show all posts

Tuesday, 1 March 2016

Happy Mothers Day Floral Wreath Card


Hello I'm back here to share a Mother’s Day card with you.  This week I’m using a variety of coloured cardstocks from Papermilldirect’s lovely colours range, and teaming it with ‘Coniston Blue’ which is this week’s  +Papermilldirect Special Offer card.  If you're quick you can grab a small box for just £4-40!!  This is for 75-80 A4 sheets of premium quality 300gsm, a bargain!!

I cut this layered floral design on my Cricut Explore using images free from within the Design Space subscription. (I know they've changed the name to Access now :D ) If you would like to cut it exactly as I have, the link to my DS file is here: https://uk.cricut.com/design/#/canvas/37189424   I have sized it to fit a 6x6 card but you can of course adjust the size to suit your requirements.


If you don’t have a Cricut then why not use the coloured cardstocks as inspiration to die cut or punch a variety of flower shapes and leaves to form a wreath shape onto a card front.  I am using the ‘Coniston Blue’ as the backdrop and shadow for my ‘Happy Mother’s Day’ sentiment, as it is the perfect shade of blue to set off those lovely bright colours.
The flowers and leaves in my design are very dimensional and this is simply by layering up the shapes and gluing them on top of each other, using a wet clear drying glue such as Cosmic Shimmer allows some ‘wriggle time’ to line them up and not leave any glue marks.
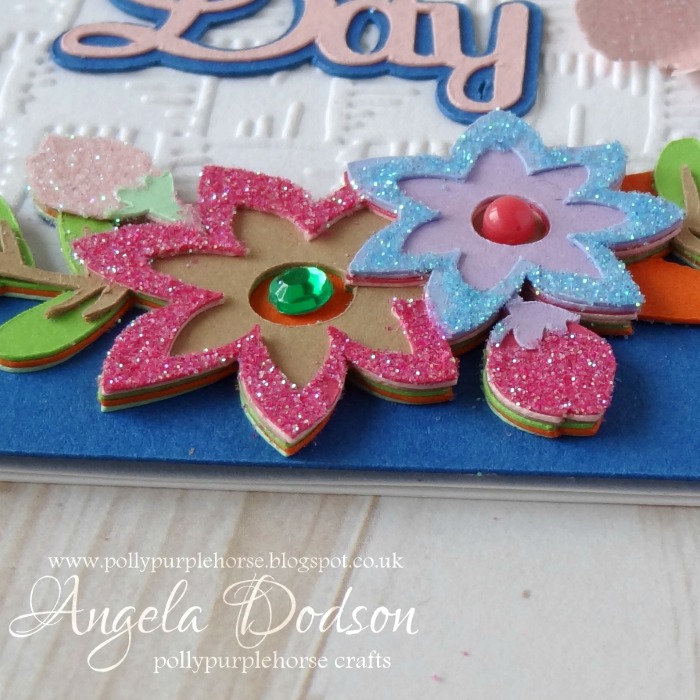


For the Plain White Card panel I have embossed it with a Basket Weave effect embossing folder through my Big Shot to add some extra detail and texture, but it could also be left plain.  The card blank is also PMD Plain White card.
To add some extra sparkle I applied some of the Nuvo glitters by first using the Nuvo glue pen on the area to glitter and then sprinkling the glitter onto it from the bottle, when dry you can gently tap the excess off and pop it back into the bottle.   (I used a small clean paintbrush to gently brush away any stray glitter afterwards)


You can add different adhesive gems, pearls or enamel dots to the centres of the flowers to make them ‘pop’ and / or add some die cut butterflies as I have done here to accent the sentiment.
Although I designed this one as a greeting card, it would work well mounted in a little box frame too, perhaps as a Mother’s Day Gift?  You could even use different sentiments in the centre or perhaps a photograph to make it an extra special gift.


Materials Used:
Papermilldirect - Coniston Blue ‘offer card’
Papermilldirect - Plain White card
Papermilldirect Coloured card - Pale Turquoise, Marine Blue, Apple Green, Spring Green, Baby Pink, Raspberry Pink, New Lilac, Buff, Orange
Crafters Companion – Basket Weave Embossing Folder
Nuvo Glue Pen – Tonic Studios
Nuvo Pure Sheen Glitter – Candy Pink, Aqua, & Diamond – Tonic Studios
Adhesive gems, pearls, enamel dots
Double Sided Tape, Cosmic Shimmer Acrylic Glue


Tuesday, 29 September 2015

Just For You...with Papermilldirect


Hello I'm back again with one of the two designs I had fun creating with this week's Special Offer Tangerine Card from Papermilldirect.  This card has been created using a manual die-cutter (my old trusty Big Shot) and a selection of dies.  (please see other post for a design using the Cricut Explore)
Using just 3 colours I created this little shaped standing card.  Tonic dies were used to cut the fancy ‘loopy lace’ front panel from this week’s special offer ‘Tangerine’ cardstock, I cut a backing panel and card back from PMD Ivory smooth cardstock and assembled a little card as follows. 
Taking one of the Ivory card shapes I scored and folded the back before joining to the other Ivory shape to form a little standing card, using a strip of double sided tape and a little cosmic shimmer glue just above the score line.  The tangerine ‘Loopy Lace’ panel was attached to the front using 3D foam pads in the centre only, to create depth.

I then cut a smaller ‘Loopy Lace’ panel set reversing the colours, so an Ivory panel was on top.  I stamped a sentiment in the centre of the panel  ( I used ‘Just For You’ from the Belle & Boo stamp set) stamping in an orange toned ink and then sprinkling with clear embossing powder before embossing with an heat gun.   Then mounted the sentiment panel on top of its base mat of Tangerine card using 3D foam pads and gluing the completed sentiment panel to the base card using Cosmic Shimmer glue.
The flowers were die cut from Ivory Smooth card and the leaves from Spring Green card using Sue Wilson ‘Faux Quilled Blooms’ die set. The layered butterfly was also die cut from Ivory smooth card using a Sizzix butterfly die set.
Detail Sparkle in ‘White Shimmer’ was applied to the flowers and also to the top layer of the butterfly.  When dry the flowers and leaves were shaped and added to the card front at right hand side using 3D foam pads, topping each with a faux gem in pale green or pale orange.  The butterfly was assembled with 3 small orange faux gems along the body, wings shaped and then it was glued to the card front using Cosmic Shimmer Glue.

Materials Used:
Tangerine ‘offer’ card - Papermilldirect
Ivory Smooth  card - Papermilldirect
Spring Green card – Papermilldirect
Verso Ovals ‘Loopy Lace’ die set - Tonic
Sue Wilson Finishing Touches ‘Faux Quilled Blooms’ die set - Creative Expression
Butterflies 4 - #658290 Die & Stamp set – Sizzix
Sentiment Stamp – Belle & Boo stamp set
Colour Chemistry Ink Pad ‘Triple Sunshine Yellows’ – Oak House Studio
Clear Embossing Powder
Detail Sparkle ‘White Shimmer’ – Imagination Crafts
Adhesives Used: Cosmic Shimmer ‘clear’ glue, 3D foam pads, double-sided tape

Papermill Design Team:
if you have a moment, please do pop over and check out the other papermill teamies blogs and see what they got up to this week: 


https://www.papermilldirect.co.uk/
Click Logo to go direct to papermill

Monday, 23 February 2015

A Mother's Day Gift Box - with Papermilldirect


Hello, today I'd like to share this Mother’s Day Gift Box with you.  I’ve sized this box so that you can pop all sorts of goodies inside, and  if you want to make an extra special gift it is the perfect size for you to fill with 3” square handmade notecards.


I decided to make the Gift Box using a scoring board and scissors rather then rely on my Electric cutter.  Sometimes it's nice just to get back to basics once in a while.  I did however use a manual die cutter and dies and a border punch to create the decorative panels.  I do like to stamp and so combined a pretty feminine stamp with the cream card and coloured using promarkers.

I have included a materials list, measurements, and lots of pics to show a step by step to create this Gift Box over on my Papermill Inspire Blog post (link here)

Please do pop over and take a look, let me know your thoughts, do you make your own gift boxes?, perhaps you have ideas for things to put into the box? 
 * Please Note - This weeks Materials List is over at the Papermill Inspire Blog link above


Papermill Design Team:
if you have a moment, please do pop over and check out the other papermill teamies blogs and see what they got up to this week: 
Barbara 
Lisa  
Sylvia  
Sandie   

Craig