Monday, 27 October 2014

Thinking ahead, with a spring in your step... with Papermill

Another week has come around and that means another fab offer over at +papermilldirect   .  This week the Design Team are casting off the dull weather and thinking ahead to Spring, and to tie in with that this week we have a lovely shade of 'Primrose Yellow' as the special offer card, 240gsm A4  in a small box for just £5-50.  This shade works well with lots of other colours and is sure to brighten your makes.  (materials lists and links at end of post).

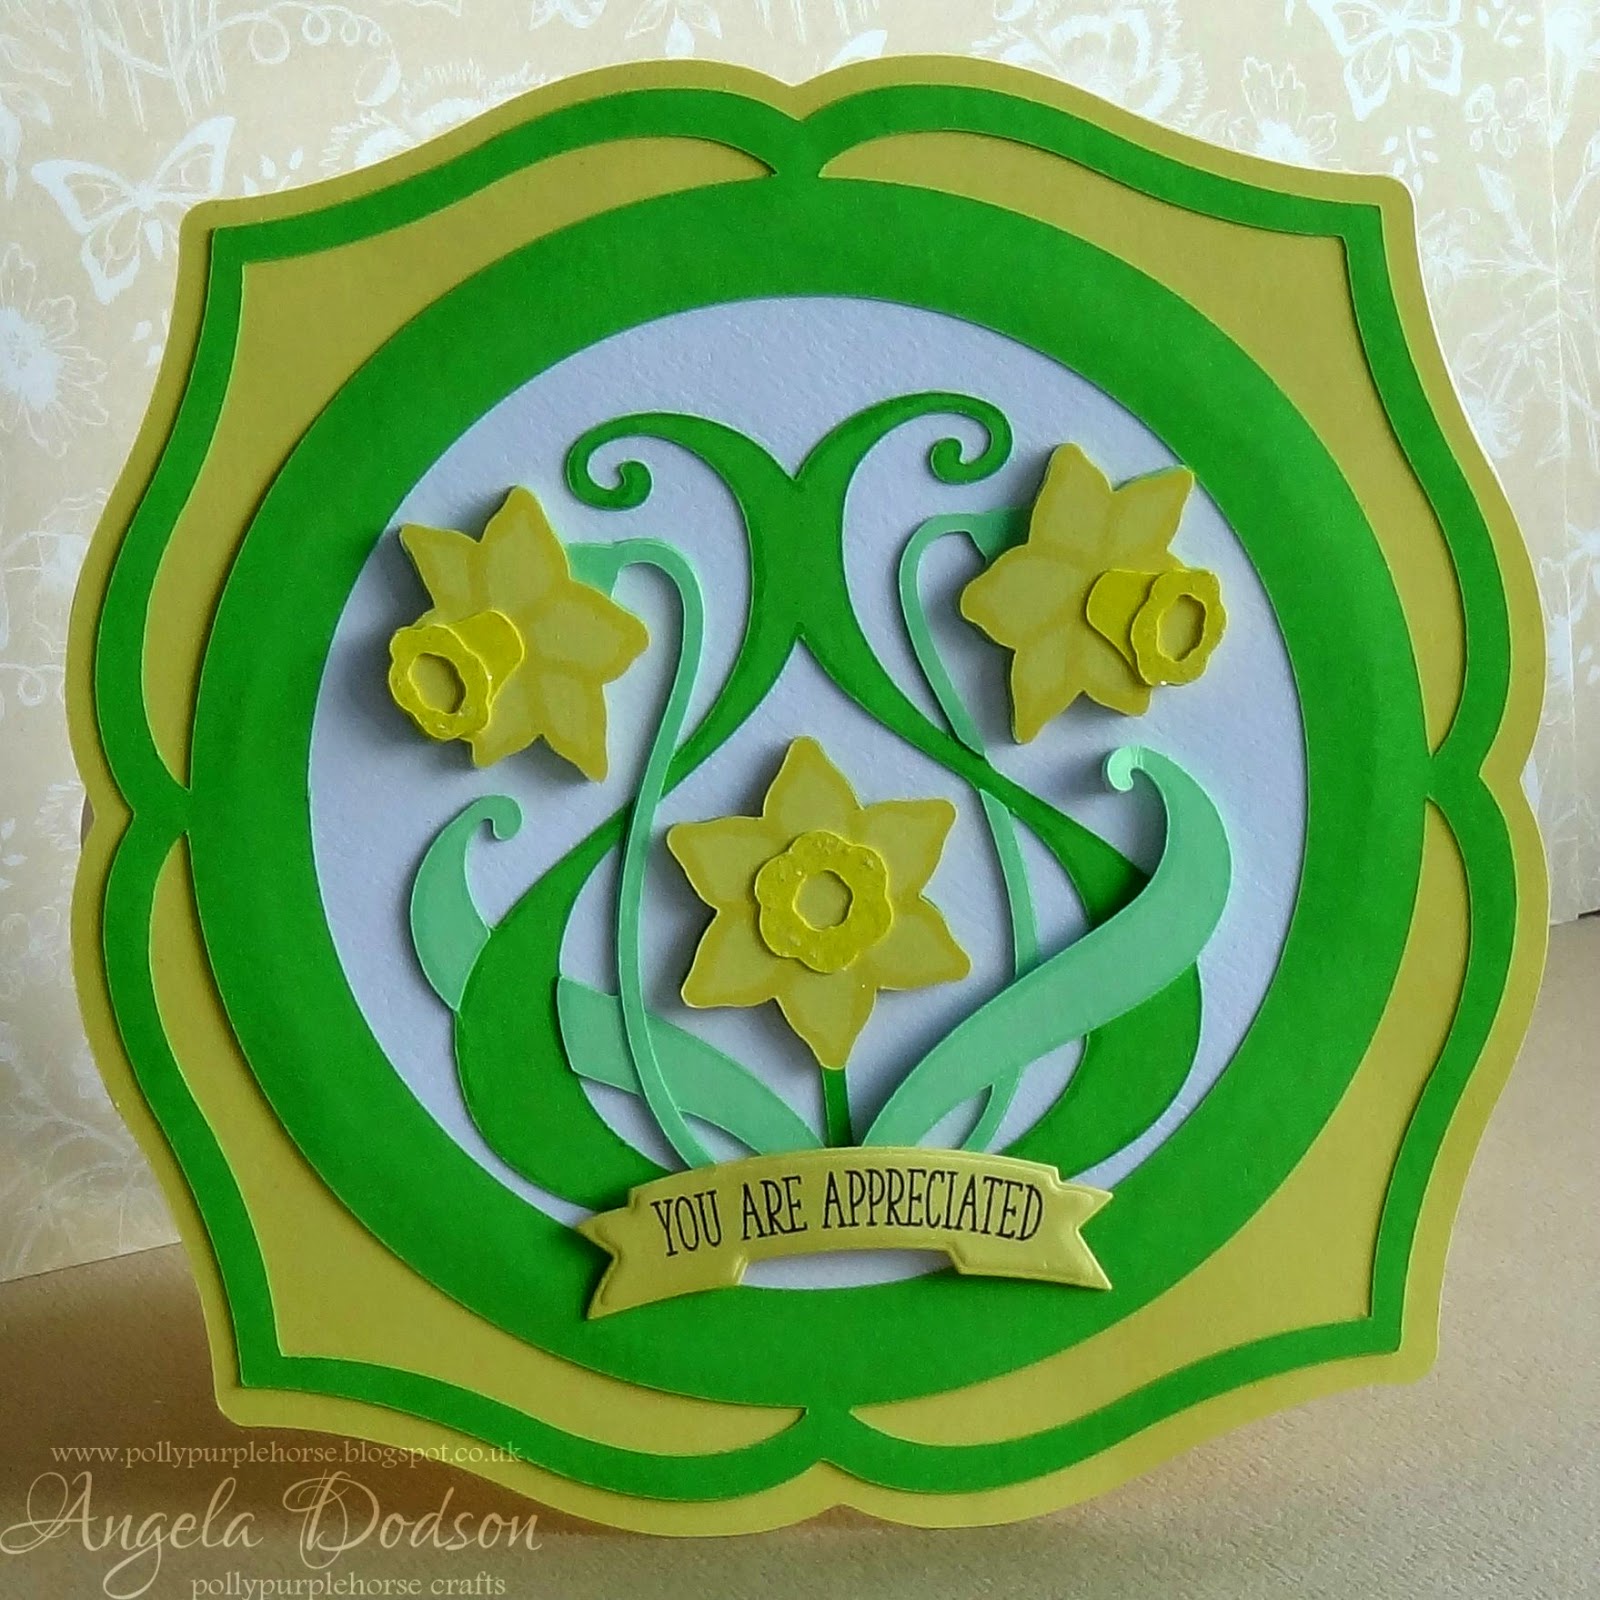
My first design features layered Art Nouveau daffodils and I created a large shaped card as the base.  Using papermill card in Primrose Yellow, Apple Green, Spring Green and plain white.  The daffodil design has also had extra detail added with a versamark pen and a little 'detail sparkle' glitter glue.


I added a stamped sentiment of 'You Are Appreciated' and cut it with a banner die.  The majority of the design was cut with my little Cricut Mini and you can see the card cuts really well  and I only use the 'light card' setting. One of the reasons I love papermill card is that it is always a dream to cut, no nasty wayward fibres in their cardstock.

For my second design I chose to create a large tag, this could be used as a gift tag for a special gift or it could become an interactive feature of a greetings card.  For this design I used the Primrose yellow and white hammered card.  I cut the flower design with my Cricut Mini and used a versamark pen  and then dusted over with a gold mica powder to add subtle shimmery detail to the petals.  The background of my tag has been embossed through a Big Shot using 2 different embossing folders.  I carefully positioned the card to emboss 'dots' on the lower portion so that it would show through in the centre of the flower, and I used a 'script' embossing folder for the top part.  You can see that the Primrose Yellow embosses beautifully too.  


I thought such a happy colour scheme should have a happy sentiment too, so I chose 'hello'  and cut it from the primrose yellow, then I followed the letters with my versamark pen and dusted over it with the gold mica powder, it adds a nice golden glow to the words, exactly how a 'hello' should be, all happy and glowing :)  The sentiment was added to a strip of white card which I embossed with the dots folder, but this time used the de-bossed side.  I do like experimenting with the reverse of embossing folders, sometimes I prefer the de-bossed side and it's also fun to mix them up a bit.

When assembling the tag I put some 3D foam behind the petals of the flower, to emphasise the shape and give a little height and interest.  A clear flower shaped button topped with a yellow sparkly faux gem made a nice centre for the flower and I found some pretty yellow satin ribbon and a sheer white ribbon in my crafty stash, to finish it off.

Thank you for popping by today, If you have any questions or just want to say hello, then please pop a comment below, I'd love to hear from you :)

Materials List:
Primrose Yellow Card - Papermill Direct
Apple Green Card - Papermill Direct
Spring Green Card - Papermill Direct
Plain White Card - Papermill Direct
White Hammered Card - Papermill Direct
Sentiment Stamps, Hello Die, & Banner Die - Clearly Besotted Stamps
Detail Sparkle 'White Shimmer' - Imagination Crafts
Versamark Pen, Mica Powder, black memento ink,
Ribbons, sparkly faux gem, clear flower button
Cricut Mini, Big Shot, embossing folders


Papermill Design Team:
if you have a moment, please do pop over and check out the other papermill teamies blogs and see what they got up to this week:  
Barbara 
Lisa  
Sylvia  
Sandie  
Sharon


Monday, 20 October 2014

I'm sharing some exciting news today!!

Hello, Today I can share some exciting news with you.  I was recently asked by Trimcraft if I would like to join their Design Team.  So did I say yes?  of course I said Yes!! I absolutely adore working with their papers and have a particular love affair with their First Edition paper collections, so you can imagine my delight to be able to work 'officially' with their brand new and upcoming collections.  Please excuse my Happy Dancing, I've had to do it in secret for a while and it's not been easy!!  :D

I'm really looking forward to starting work with their new collections very soon.  In the meantime, I will share a few of the designs that I have already made this year, The following were made recently with the Bella Rose collection, such beautiful patterns and not just florals.


If you would like to know more about these and perhaps a materials list, then just pop a comment below and I'll add it to the blog .I will also share some other designs next time, perhaps some Christmas designs and paper folding?

So It's been a bit of an odd couple of years for me, some lows and some highs, I won't bore you with the details but the lows involved redundancy and health issues. Anyway throughout all this, my love of paper crafting has grown even more, it has helped me through and whilst it may not cure all problems it is a jolly good distraction and perfect therapy.  My crafting highs really are dreams come true, I am so proud to be both a member of the Papermill DT and now also the Trimcraft DT.  Both having quality reliable products that I use every day and feel confident promoting and recommending.  So look out for lots more makes and projects from me.

Thank you to everyone that pops by to take a peek, or leave a comment, I am grateful for your support of my little blog. Going forward I am trying to organise my blog a little better and I will add an area for Tutorials (look I made a start with a Title :D). As always I am happy to answer your questions, I love reading your comments, and if you have any ideas for what you would like to see here, then please don't be shy :)

Happy Crafting!!


Friday, 17 October 2014

Christmas Gift Box Ideas using Papermill card

Hello and welcome to my little Blog.  The Theme for the +papermilldirect  Design Team this week is Christmas Gift Ideas, so we have all been busy creating boxes and tags and other festive items from across the range of papermill card.  There is also a special offer running on a 280gsm 'Smooth White Card' this week which is available in Midi and Mega box sizes starting at just £20 so it's the perfect time for stocking up. (or perhaps drop hints to get some in your Christmas stocking this year).

So what craftiness did I get up to this week? Well I thought I would use a theme of Poinsettias to create 2 different shaped gift boxes.  First up I created this square box from papermill white hammered card, I love the hammered effect and think it gives a look of snow with it's lovely texture.  


I die-cut a poinsettia from 'Post Box Red' card and applied 'cosmic copper' ink and versamark ink to enhance the embossing.  Forest Green card provides a very rich green perfect for the leaves, and I also used it to punch a decorative strip layer for the box lid. 
 I found a lovely red & gold ribbon in my craft stash and coloured some faux pearls with a gold promarker to finish the box.  I love the classic festive colours and these little boxes will be great for presenting gifts to family and friends this year.

Still keeping with the poinsettia theme I thought I'd try to make a triangle shaped cracker, I scored the design on a scoring board and then used a craft knife to remove the triangles to create the cracker shape.  I again used the hammered card but this time in the Rich Cream colour.  


I decided on a paler colour scheme for this poinsettia and die cut it from a mixture of Spring Green, White, and Cream Pearlised cards. Again using the Forest Green card to create my leaves.  This time the embossed details where very subtly enhanced with versamark ink and I added 3 faux peals to the centre.  The 'Seasons Greetings' sentiment was die-cut from the Spring Green card and I added some extra sparkle by applying Detail Sparkle in White Shimmer. 


 Again a search of my ribbon stash and I found a lovely cream and gold ribbon which I tied in large bows each side of the cracker.  I enjoyed making this, my first time actually cutting a cracker shape and I managed to find a sharp craft knife which easily cut the card and not my fingers!!  Which is always a bonus :D

Materials List
White Hammered Card - Papermill Direct
Rich Cream Hammered Card - Papermill Direct
Post Box Red Card - Papermill Direct
Forest Green Card - Papermill Direct
Spring Green Card - Papermill Direct
White Pearlised Card - Papermill Direct
Cream Pearlised Card - Papermill Direct
Cosmic Copper Ink - Brilliance Dewpad
Versamark Inkpad
Detail Sparkle in 'White Shimmer' - Imagination Crafts
Faux Pearls, Ribbons, Promarker, etc from stash 
Layered Poinsettia Die set S5-055 - Spellbinders Shapeabilities
Sentiment Dies LR0225 - Marianne Designs Creatables
Border Punch 'Threading Water' - Fiskars 


Papermill Design Team:
if you have a moment, please do pop over and check out the other papermill teamies blogs and see what they got up to this week:  
Barbara 
Lisa  
Sylvia  
Sandie  
Sharon


Friday, 10 October 2014

Wedding ideas with papermill card

Hello, and welcome to my weekly papermill DT post.  This week our theme is Wedding Stationery and to go with that papermill have a special offer on their lovely Ivory Felt card across small, midi & mega box sizes, starting at just £6-50 per box.  The Ivory Felt card is a sumptuous 300gsm and perfect for lots of designs. 

Now I must confess that Wedding Stationery is not something I have much experience of, but I thought it would be fun to make some 'Save The Date' cards and 'RSVP's using some of the other fabulous card stocks from  +papermilldirect.  I will first apologise for the photos, the weather was horrible this week and the light not good, so the pics do not do the cards or the beautiful card stock used justice.
First up is a Bird themed RSVP card that would be great to use as an invite.  I have created the card base from papermill's Sky Blue card and have embossed the front flap only through my Big Shot using a swirls design embossing folder.  The layered Bird has been cut from Papermill White Linen card, which I also used to die cut the letters for 'RSVP'.  A little faux pearl for the eye to complete it.  These little cards don't use much card or expensive materials and so would be perfect for those on a budget.  Just add your computer printed details inside.  Cut using a cricut mini they could be made in batches and the embossing could be left off for quicker makes.  
My second design is a 'Save The Date' card with a heart theme in my favourite colour of course. I have also cut this with a cricut mini using papermill's White Hammered card to form the card base. 


The heart motif is cut from my favourite papermill Purple Grape card. The 'Save the Date' phrase has been cut from white hammered card and lightly coloured with pan pastels, attached to a shadow base of papermill grey card. A purple ribbon and faux pearls to finish.  


Just add an insert with your details inside to complete. I printed these off on my computer and then die-cut with a scalloped square die. Again if making in large quantities, you could always omit the pan pastel colouring and perhaps the grey card shadow layer to the sentiment.
So there are my 2 projects this week, if you pop by the other papermill DT ladies' blogs (links at bottom of post) you will find lots of other ideas for cards and Wedding Stationery.

Thank you for popping by and as always I am happy to help with any questions you may have, and I do love reading your comments too, so please don't be shy, say hi!!  :-)

Materials List
White Linen Card - Papermill Direct
Sky Blue Card - Papermill Direct
White Hammered Card - Papermill Direct
Purple Grape Card - Papermill Direct
Grey Card - Papermill Direct
Faux pearls, ribbon, pan pastels 
(optional) Embossing Folder, dies, 
cricut mini 

Papermill Design Team:
if you have a moment, please do pop over and check out the other papermill teamies blogs and see what they got up to this week:  
Barbara 
Lisa  
Sylvia  
Sandie  
Sharon

Friday, 3 October 2014

Getting Cute n' Funky with papermill

Waving hello and welcome to this week's papermill blog post.  This week we are revisiting Halloween ideas and of course Black plays a big part in that colour scheme, so the special offer this week is a fab 300gsm A4 Black card in a small box for just £6-50!!  So a perfect time to stock up.

I've had a bit of a 'not feeling too well' week, with some Drs appointments and more blood tests and things, so I have kept this week's makes simple but hopefully you will find them cute and funky too.

I used my Cricut to cut out these fun layered Spider characters.  Using papermill card in Grey, Dark Violet, Purple Grape and of course Black.  I thought the black body part would look better with some texture, so I ran it through the Big Shot using a dots patterned embossing folder and then rubbed some blue coloured gilding wax over it to add a sheen that catches the light.  I added stickles glitter glue to the top hats, using a different colour for each Spider, then all the black parts were added to the main body using 3D foam pads to give height.  
 
The eyes were originally just small holes, but the minute you start to put a googly eye on something that is when it comes to life with it's own personality.  So I chose a different colour for each spider and the large eyes with lashes seemed to work best.  Rather than make these into cards I made them into fridge magnets, so a little round magnet is attached to the back of each and I placed them on my fridge freezer door.  
I like the little shoes the spiders are wearing and with the top hat make me think they are about to start tap dancing across my fridge freezer.  They are definitely not scary enough to keep my children out of there though :D


Materials List:
Black Card - papermill direct
Dark Grey Card - papermill direct
Dark Violet Card - papermill direct
Purple Grape Card - papermill direct
Dots embossing folder - Sizzix
Ultramarine Metallic Gilding Wax - Creative Expressions
Mercury Glass Stickles - Ranger
Glitz it Purple Sparkle glitter glue - Docrafts
Googly Eyes

if you have a moment, please do pop over and check out the other papermill teamies blogs and see what they got up to this week: Barbara Lisa Ruth Sylvia Sandie Sharon